
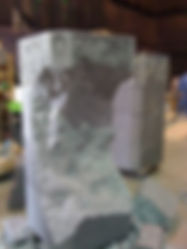
Set Sculpture (EPS Foam Carving)
Styrofoam is also known as (EPS) Expanded polystyrene. Styrofoam comes in different grades or densities. Ask your dealer what’s best suited for your purpose. I have found that the denser the foam, the easier it is to carve and sand. The lighter cheaper foam can become difficult to tool. It is, however, more expensive than the lightweight. The UK and New Zealand have strict laws against using Styrofoam and fabricating much of their set parts in Plaster from my knowledge of those whom I know work there.
For this post, we’ll say Styrofoam is the material best suited for the job. This comes in handy for very large, lightweight set pieces or oversized props.
Depending on where you are located, we buy Styrofoam in Billets measuring 4’x4’x16’ typically, at this size, you need a huge space. It is possible to get 8’ lengths.
In some cases, if all you can find is Styrofoam sheets at lumber yards or a Home Depot will carry such items in different thicknesses but only somewhere in the 3’-4’ range. The following techniques also apply to (XPS) Extruded polystyrene. These are also insulation foam sheets found in hardware stores. Slightly more dense. They are ideal for smaller carvings such as miniatures and dioramas.
This big billet size is ideal for carving statues, columns, capitals, or anything of bulk. A nice advantage is that Styrofoam can later be hollowed out to decrease its weight; a pre-determined cut-out section then can be glued back on.


The next step is sizing up the best way to economize your billet of foam for.
Hot Wire Cutting: This is a system used in which a
Nichrome wire is connected to custom-made or bought handles, a bow, or a hot wire table rig with a switch connected to a wire and a plug. Check out YouTube for an example of hot wire homemade tools or search the internet to get some ideas. Custom-made is more economical if you’re doing small projects. We will get into building hot wire tool on another post for now let's stick to terminology.

Hot wire table


This variac has a plug adaptor cord

Plug from lead into variac

Hot wire handles
Connecting wires AKA "leads" plug into "handles" the other end plugs into the front of the variac. The variac itself plugs in to the wall outlet.
Hot wire leads

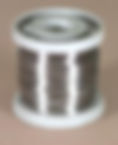
Nichrome wire: There are two readily available types of wire, Nichrome A, which contains 80% Nickel and 20% Chromium, and Nichrome C contains 60% Nickel, 16% Chromium, & 24% Iron.
The only real difference is Nichrome A has higher tensile strength and a higher melting point. Whereas Nichrome C has a little higher resistance per foot and increases more resistance per foot as temperature increases.
Both come in gauges ranging from 10-40. The smaller the gauge, the larger the diameter. 10 gauge = 0.102 inch diameter, 40 gauge = 0.0031 inch diameter. I tend to use a higher gauge myself; everyone is different in preference though.
The more wire length you have, the more resistance it creates, therefore requiring an increase on the variac dial. It’s best to test your wire heat by starting from zero and increasing the dial on the variac till it cuts through your Styrofoam piece with ease.
In many cases, you can let the wire get close to red, then dial it back. Test for yourself to adjust accordingly. Go slow to start as the wire can heat up incredibly fast.


Variac that leads can be plugged directly into.
(Note) Always turn the variac all the way down to zero before plugging in or turning on to prevent the nichrome wire setting to burn up from being too hot.
Adjust the heat/power level according to the length of the wire. For example, a 2' wire might sit at 20V. Whereas a 16' wire might sit at 100V and up range.
This plug is inserted into a Variac voltage regulator rated at 110v input with an output voltage of 0-130V. Maximum output current is 20A with a capacity (KVA) of 2.0. The front of the unit has two receptacles, a voltage meter, fuse and on/off switch. Some have currents of 15A. 20A are best. This is a heavy item at approx 24lbs.
Variac voltage regulator
The variac gauges the heat level and allows the wire to heat up, creating a Hotwire cutting system. Safety risks include severe burns from the heated wire, DO not touch it to see if it’s hot. Yes sounds stupid, but I’ve seen someone do it!!
Always turn the heat level down before plugging into the variac otherwise, your wire becomes flash paper and will glow orange and burn up before your eyes….seen it done, mistakes do happen.
WARNING: Always Refer to building instructions through an expert, don’t try this at home without the proper advice. Wear a well-fitting Respirator with HEPA, N100, P100, or R100 cartridges whenever hot wire cutting. I use 3M and North masks. Replace the cartridges when either you haven’t used them in a while, or the smell is evident from excessive use. To keep your cartridge from being used up too soon, store in either a well-sealed zip log freezer bag or a plastic bucket with a sealable lid. This delays the cartridge from continuously working when exposed to the environment. Ask your local safety supply company about recommended respirators. The fumes given off from hot wire cutting contain CARCINOGENS and are extremely bad for your health. This can cause headaches, sore eyes, and throat. Cutting should be done outside or in a well-ventilated area, or if you have access to a paint booth with extraction fans.
READ: Hot-Wire Foam Cutting Exposure Assessment During Theatrical Staging PDF Document actually tested our IATSE 891 Vancouver crew for the health and safety of hot wire EPs foam cutting.


Templates: can be cut from 1/4” banana board from a hand-drawn or enlarging projector that is traced onto the board and then cut out with a jigsaw to get your out shape. Two of the same are required as the hot wire runs along this on each side of your billet, cutting out the shape. This saves excessive time in blocking out your piece and getting the overall basic shapes. It’s recommended to run a strip of aluminum foil tape along the cutting edges of your template as the hot wire if stopped, can burn into your board…I also like to drill randomly spaced holes in the template and use Duplex nails, AKA double head nails, to hold it to your billet of foam. Note: do not position your nails where the hot wire can hit them...It will not cut through a nail! Aluminum straight edges with holes drilled through are ideal for making straight cuts or " slabs of foam at consistent sizes.
The Hotwire system is ideal for quick sculpting with less mess. But eventually, you’re going to have to Carve the foam.


Maintaining and Cleaning your mess is inevitable with any Styrofoam project. The foam beads, when carving, scraping, and sanding, get everywhere. Tape a roll of polythene plastic sheeting to the walls and floor to make a containing room. A painter's plastic sheeting drop cloth will do too. Surrounding your area is best for maintaining the mess. Check your Foam distributor for a recycling program. Most will take Clean foam back to recycle into new foam. It should have no glue/ dirt/ stains on the foam.
Personal Protection
I suggest wearing at least a dust mask when carving, and safety goggles also to keep dust out of your eyes. The fine particular dust can enter your lungs and create a dry sore throat and overextended work. Styrofoam can also get into your eyes and become irritable. Usually, you can flush with water to get out. Goggles will only make your life easier. For clean up, fill a spritz bottle with water, and on a fine mist, occasionally spray the floor, not too much. When cleaning up at the end of the day, a sweeping floor compound is ideal Dustbane is widely used. Also, a shop vacuum is best, or an air compressor for containing the mess with an adjustable pressure nozzle, set on low; this allows you to blow the foam off walls. When cleaning, safety regulation state: The nozzle pressure must remain below 10 psi (69 or 70 kPa), and personal protection equipment (PPE) must be worn to protect the worker's body, especially the eyes, against particles and dust under pressure. For simple cleaning, wear goggles so dust doesn’t get in your eyes.
In many Professional shops, workers use low-powered battery-operated blowers to clean themselves off.
WARNING: Blowing styrofoam dust off with compressed air itself can be a severe hazard. On rare occasions, some of the compressed air can enter the bloodstream through a break in the skin or through a body opening. An air bubble in the bloodstream is known medically as an embolism, a dangerous medical condition in which a blood vessel is blocked, in this case, by an air bubble. An embolism of an artery can cause coma, paralysis, or death depending upon its size, duration, and location. While air embolisms are usually associated with incorrect diving procedures, they are possible with compressed air due to high pressures. While this seems improbable, the consequences of even a small quantity of air or other gas in the blood can quickly be fatal. Understand that this is an extreme case, but I have to put out this warning.
Shaping tools
Another approach to shaping foam other than hotwiring, which is the most commonly used, is to cut with an Electric chain saw. This can be found in hardware stores or, in some cases, rented. Don’t use gas too awkwardly to fire it up over and over again, as you will be cutting the foam and then placing it down repeatedly. This is a quick effective way to block out your shape, but this is three times the mess of a hot wire. It can also be used after you’ve hot-wired to better define your shape. Today's safety standards require wearing a face shield helmet and chainsaw chaps.


You can get even more refined with a Spiral curry comb. This is a tool used to brush horses, with is ideal for shaping foam. Highly used and in every set sculptor kit. They are hard to find due to curry combs changing, but horse grooming or some pet supply companies still carry them. It is best to get the smaller version with no more than five rings. These rings will eventually break during usage, so buy a couple of them they are cheap.


Carving knives: Again, another personal preference here. Most sculptors use a fish fillet knife with a long thin blade. Some like an Olfa HB knife with replaceable blades.
And many like to find unique knives or custom-built ones that best suit them. I like a good fillet knife and an Olfa HB knife, plus a smaller fruit carving knife set for fine detail.
Olfa carries a variety of knife sizes but HB is the most highly used in the industry.


Maintaining sharpness is key to a good carving. Carving stones of in some cases a handheld sharpener helps.
Gribbler (custom shaping tool)


The Gribbler is a custom-made sculptor tool. It is an angle grinder fitted with a fiberglass disk that has holes drilled through where tek screws are epoxied into the plate a hole is cut in the middle of the plate to fit the attachment plate. WARNING: This is a custom-made tool, not certified. If fabricating one, use a face shield and great precaution when operating.
Pics and axes
Another example of foam carving tools is one store-bought, the other custom-made. Pics and axes are ideal for creating chunky organic shapes like rocks or dirt and also ideal for creating rubble or debris edges.

Gluing styrofoam
A Hilti- foam gun with replicable canisters is the best result for gluing foam pieces together. After applying, push pieces together to squish the glue down (the flatter the glue, the tighter the bond as this foam expands, which you want to prevent). Pull the pieces apart and spritz with water to accelerate the drying time. Let the Hilti-foam get just past tacky to the touch…don’t use your hand to test. Do a small test first for a feeling of timing. Hilti-foam is impossible to get off that easily and can take many hours in a shower or eventually sweat from your hands, so, therefore, wear surgical gloves. The best way to get Hilti-foam off is to wear a pair of gloves for many hours, allowing your sweat to penetrate through the foam, making it lose. Several hand cleanings may be required.
Don’t panic it’s common. Hilti-foam will not come off clothes either. Nasty, but the most effective gluing system.
Another Styrofoam glue is 3M spray 78. However, unless both gluing surfaces are absolutely flat is less effective than the Hilti glue version. Also, in some cases, 3M spray 77 can be used by applying two coats of light dusting to both surfaces (allow to become tacky) and then gluing. Again like spray 78, both surfaces must be flat for best results. A direct heavy coat of spray 77 on styrofoam can lead to the melting of the foam. So light dusting is important.


Skewers and dogs
From bamboo wood skewers for holding smaller sections together to metal skewers (custom made) for heavier jobs to metal "dogs" used for heavy-duty of holding two big glued areas.


Sanding foam
When you’ve sculpted your piece to the dimensions required, fine detail or smoothing out is achieved best with an abrasive sanding pad with replaceable sheets or Drywall sanding sheets, sometimes sandpaper at 80 grit. Eventually leading to Sandpaper at 100, 120. Depending on your foam selection will determine how to sand it. Some foam is denser and easier to sand.
Test it out on a spare piece first, as certain foam grades tend to tear when sanded. If possible, use a better grade, denser for best results.


Foam coating
Now that you have your part is finished, you can coat it in many different ways. The most commonly used in the film is the polyurethane spray coat system. These are usually companies that have an expensive spray system using 55gl barrels of material


Demand products carry systems for hard coating. These are expensive. Another way is to buy your own urethane two-part mixing kit like Smooth-Cast 300 for a smaller application from Smooth-on. This can be brushed on foam as a coating. Foam coat from Rosco. Google foam coat, to track down a supplier. Many filling and sanding layers are required. Hard coat spray systems leave an orange peel look which then needs filler to get smooth.


This might also be too expensive. The cheapest way is to water down carpenters' glue. This glue can be purchased in 1-5 gallons. It all depends on your project.
Never spray your Styrofoam with aerosol paints or primers. Acrylic or latex paints through a spray gun are fine. ALMOST any organic solvent (not alcohol) dissolves polystyrene!
Acetone can be used to create a melted, set effect. WARNING: if you attempt this use a respirator in a well-ventilated area or outside.
Lastly, another option is to apply thin-set mortar with a hopper gun and smooth it out or with a paintbrush which is much more time-consuming.


Bonus tip
After carving, run a heat gun over the craved areas to eliminate the "beads". It also creates a less flakey surface. Makes your carve prepped for hard-coating or paint.

For sculpting samples check out the gallery under "Set Carving"